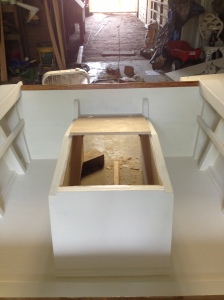
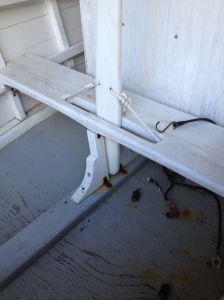
Completed!

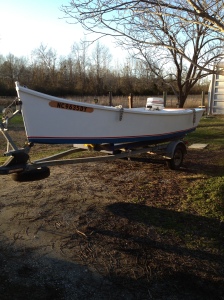
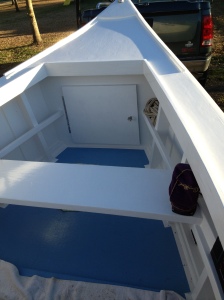
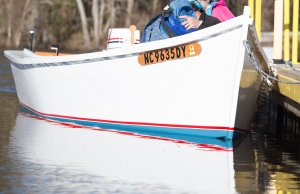
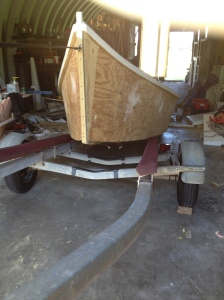
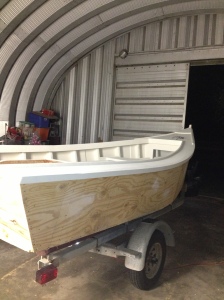
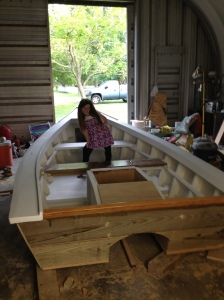
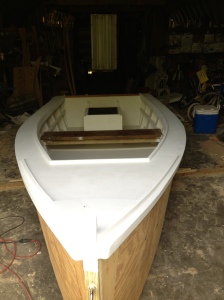
Finally after nearly a year I have finished the boat. Some of the things I did were to paint a red bootstripe on the boat, install the lights, and a few other odd and ends I had left. I also made oak plagues for the boat numbers so when it was time to repaint, I could just remove them, paint, and reinstall without having to paint around the letters every time.

IMG_0457IMG_0460

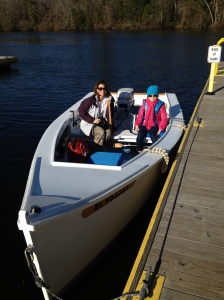
Next, it was off for the maiden voyage. Sunday the 19th had temps in the 60’s, so it was perfect. We went to the Cape Fear river for the test, but next will be in the intercoastal here in Wilmington.

IMG_0490IMG_8195

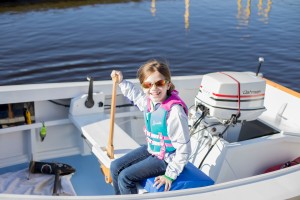
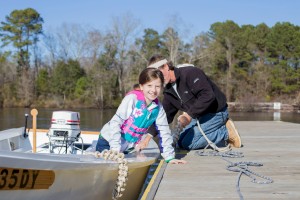
Finally here’s a few pics  of the ride. Thanks for watching a tiny dream come to life!

IMG_8212IMG_8236IMG_8242IMG_8243IMG_8272

Fitting out the boat

The holiday season from Halloween to Christmas kind of sneaked up on me and put progress on the boat to all but a halt. I did manage to do a few things though.

I finished the old timeyIMG_0388[1] stick steering handle which I made from oak with stainless bolts and washers. The rope was attached in holes on the stick and ran through a series of stainless and brass pulleys. Then it was attached to eyebolts in the motor by stainless springs. I then made a cover over the notched hole in the seat made to fit the handle.

I mounted 2 evebolts to the seat on the passenger side bottom and used a pulley strap to secure the battery box to the bottom of the seat. After that, I ran the wiring for the switch panel from the battery with #8 copper. I ran all the associated wiring to the perspective locations and also wired in a lowrance fish finder mounted to the seat in front. I also refinished the motor control, painted it, and mounted it and the cables beside the driver seat.

I painted the bottom of the floor in light blue(so it won’t get hot and to cut glare) with grit added to make it nonskid. I left the 1″ edge between the sides and floor the original paint so water could flow easily without getting ponded in the corner and holding because of the non slip. I also put the finish coat on the entire outside of the boat.

I built and painted the door for the cabin and the splashwell where the motor is. I then mounted the cabin door with a stainless piano hinge and the splash door with stainless door hinges. I got these at Lowes and you wouldn’t believe how much cheaper they were compared to a boating store.

I took 1″ aluminum square tubing and mounted 2 on each side of the motorwell. I attached them to the 2×2 strips with 3/8″ screws. Each bar has a eyebolt on each end. This will be used to mount the (2) 6 gallon fuel tanks and have them secured off the floor. The eyebolts are for bungy  straps to hold the tanks in place.

I took the motor cover and hand painted the johnson logo on each side. I then added a red and a black stripe to finish it off.  Not the best i’ve seen but it was by hand.

Finally I did do some things to the trailer to make it load a little easier. I added a taller winch post, added some bigger rollers, and repaired the trailer jack.

At the start of this post, I said I hadn’t done much. After looking at the list of what I did, I actually got more done than I thought. I’m on the homestreatch now, so hopefully I will be finished over the next few weeks .                                            .IMG_0395[1]IMG_0408[1]IMG_0439[1]IMG_0438[1]


Test floating for the first time

IMG_0341[1]IMG_0344[1]IMG_0345[1]IMG_0347[1]IMG_0348[1]IMG_0352[1]


Today is the water test! I’ve looked forward to this day for a long time. We pulled the boat into the yard and put the motor hood on just to see what it looked like. I’m very happy with the way this is coming along. Me and my best helper(soon to be first mate) took it down to the Cape Fear River to do a float test. I gave her the honors of being to first to get in the boat on the water and she was tickled to death! The boat passed it first test with flying colors. It only drafted a couple of inches, was so stable it was actually hard to rock it, and I loved the look of the lines when it sat it the water! Now it’s back to the barn to fit her out and do the final painting and finishing.

Getting motor ready, finishing well box, and mounting motor

IMG_0303[1]IMG_0316[1]IMG_0315[1]IMG_0338[1]

I have been really busy lately, so progress has been slow. I did manage to take the 82′ 35hp Johnson motor and do some work on it. I took a 4″ angle grinder and took off all the paint from the bottom of the motor down. Then I sanded it starting with 100 grit and worked my way up to 400. Then I put 3 coats of self etching primer and two coats of white paint. After that I put all the parts back on that I had removed for painting. The cowling will come later as it is so bad, I will have to do some body work to get it right. I then completely finished painting the well box to prep it for the motor. I then took a sheet of 1/4″ aluminum and cut and bent a plate to mount to the wooden box so the motor mounts wouldn’t cut into the wood. Then me and my favorite helper winched it into place and mounted it using just the clamps for now. The next step is to take it to the water and see how balanced it sits and how much of a draft it has. That way as I fit it out, I can locate stuff in different locations to make it level if I have to.

Rigging the trailer, Flipping the boat back over, and putting on trailer

IMG_0295[1]IMG_0296[1]IMG_0298[1]IMG_0301[1]Finally I have got the boat flipped over and on the trailer. This is a milestone for me as the next time it comes off the trailer, it will be in the water. Yess!!!!!  I took the trailer I had bought earlier and stripped off the carpet and bunks. Since it was set up for a v-hull, it was angled at 15 degrees. Since I needed added clearance for a flat bottom over the fenders, I added 4×6’s on top of the existing 2×4 bunks. I cut a 15 degree angle on the bottom of the 4×6, bolted it to the old bunks with 3/8″ galvanized lag bolts and washers, and inserted 3/8″X2″ carriage bolts into the 2×4 bunks before bolting it together. The bolts went back into the existing angled brackets and bolted in place. Then I took a PVC gutter downspout and cut it down the middle lengthways. I then put one half on each of the 4×6’s and screwed it on the sides with 1″ stainless steel screws and washers. I didn’t want to use carpet as in past experiences, it tears and gets grit in the fibers that tend to basically “sandpaper your bottom paint off. The gutter is just an idea I came up with. The carpet was $40 per strip and the gutter was $12 total. If it lasts a year, i’d be willing to spend another $12. I can literally slide the boat back and forth by hand it’s so slick. I then rotated the boat back over, backed the trailer under it and lowered it down. I then pulled it outside. This is the first time the boat had seen daylight and man did it feel great! After figuring how long the bunks needed to be, I cut them off. I then screwed a treated 2×6 across the front and bolted a keel roller and bracket to the front. All of the bunk wood was treated to 2 coats of blue semi transparent stain. This is just a temporary fix. Some time around January or February when its to cold to fish, I plan on disassembling the trailer and completely redoing it.  Now for the first time, it feels like i’m finally making process. Before it seemed like alot of work and a little progress. Every little thing I do now seems like big steps at least visually. The next steps now are to start the rigging inside the boat.

Applying paint to outer hull

IMG_0265[1]IMG_0269[1]IMG_0287[1]IMG_0288[1]After getting the hull shaped and epoxyed, I moved on to starting the painting process. First I sanded the whole hull with 100 grit sandpaper. Then I applied 3 coats of primer sanding between each coat. Then I applied 3 coats of exterior marine gloss and sanded between each coat using 150 grit sandpaper. Then I taped off the hull and applied the bottom paint. I also applied 3 coats. The paint that I was using was Rustoleum marine paint.(belive it or not from Lowes) I compared alot of different paints, and for what I was going to use the boat for, It was the best choice for me. It seems everyone has a brand that is “The Best”. Just choose what works best for what you’re going to do with the boat. The primer, antifoul bottom paint, and the gloss, were at least half the cost of the top brands at places like west marine. I found out the hard way that getting a good finish isn’t how much you pay for the paint, but the quality of the plywood you use. I bought regular marine plywood, but if I had to do it again, I would buy a higher quality like “Okuma” if a flawless finish is what you want. The plywood I bought didn’t show all the manufacturing defects until I applied the gloss. The good thing is that even though I would like for the hull to look like a car hood, i’m satisfied with what I got cause it’s gonna be a fishing boat and the simplicity of touching it up with a brush after it’s got banged up, is more important than a mirrored finish. Believe me if you fish a boat hard, there’s gonna be plenty of dings!

IMG_0216[1]IMG_0218[1]IMG_0219[1]IMG_0220[1]IMG_0251[1]After getting the boat flipped over and secured, I started the long task of shaping,fairing and sanding the outside hull. During this time I found all the little areas that needed fixing and repaired them. Then I took the sander and sanded these areas and shaped all the edges to be rounded.. Once I got it the way I liked, I used 4″ fiberglass tape to cover all the joints and edges. I used epoxy to saturate the cloth and then sanded it smooth. Then I added the first coat of epoxy over the entire outside of the hull. After that I added the two smaller keels at the rear of the bottom to help keep the boat from skidding in a turn and to help protect the bottom if I ran aground or decided to beach the boat. After they were secured and faired in. I added two more coats of epoxy to the hull sanding between each coat with 100 grit sandpaper to make sure it had good adhesion. The next step is to start the process of painting the hull and applying the bottom paint. As you can tell by my little girls eyes, it was late and that was for another day.

IMG_20130306_172543IMG_20130306_172211IMG_20130306_172228IMG_0056[1]Now that I am somewhere near the middle point of completing this boat, I thought I’d share a thought about how this whole thing started. Up until 2008 I had went to Harkers Island fishing for over 20 years. During this time I had went from a 1971 Brunswick Marine with a 115hp mercury,to a 19′ Ebbtide with a 305 ib/ob,to a 18′ nautico with a 75 hp force,to a 21′ Seacat with twin 70 outboards, to a 27′ worldcat catamaran with twin 225 hp Yamahas. When the housing industry went downhill the first thing that had to go was the boat.  All I had was a 10′ aluminum johnboat . I knew I wanted another fishing boat but it just wasn’t in the budget anymore. So I took the johnboat, added a 3 hp yamaha, a trailer, seats, gps, and other accessories and traded it for a 1978 14′ hobie cat sailboat. Then I took the sailboat and completely restored it and the trailer.Then I sold the boat and decided that to have what I wanted, I would have to build it. I had always admired the well boats that the fishermen on harkers island had used to set nets with. I ordered a set of plans from the maritime museum in Beaufort and got started. I took the money from the hobie and got the basic wood I needed. Now nearly 6 months later, i’m at the midway point. To stay in budget, i’ve done some bartering to get things like the trailer and the motor. The materials have been bought a little at a time($20 here $50 there).

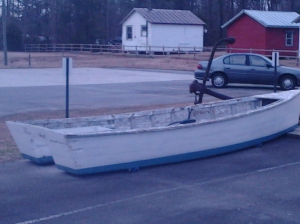
The pics above are from a museum between New Bern NC and Washington NC. This is basically what the boat will look like when finished. The fourth pic is a wellboat that is still being worked at Harkers island.

The next post should have info on the progress of finishing the outer hull.

Getting the trailer and flipping the boat over

IMG_0192IMG_0193IMG_0206IMG_0204I finally got the trailer for the boat. I went to the big town of Selma NC to get it which is a couple of hours away. I wanted to get one that was used in fresh water as the ones here at the coast have alot of salt corrosion. I got it up on the trailer(by myself) and figured out what I would need to do as far as bunks as rollers. Being a well boat, I will need to set it up where it will stop before the lower unit hits the trailer.

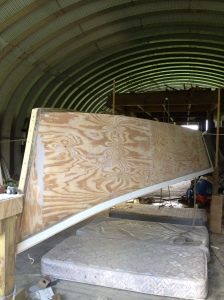
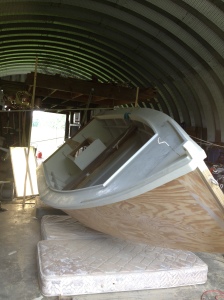
Next I had to figure out a way to flip the boat over to finish the bottom.(by myself again) I used a rachet strap mounted to the loft ceiling and a floor jack to get the boat off the trailer. I was originally going to turn it over and sit it down to finish the bottom. It was so difficult to get it up that I decided to make it where the boat would pivot instead. Using a 5/8″ bolt and washer through the transom and a 5/8″ lag bolt through the stem, I built a stand with motorcycle handlebar riser clamps to use to pivot the boat using pulleys attached to the walls. Now I can turn the boat at will to work on the sides or bottom. That way when i’m finished with the bottom, I can flip it over and set it on the trailer without all the hassels I encountered getting it on the trailer and off. Next it’s off to shaping,fiberglassing, and epoxying the outer hull. Wish me luck! Oh yea, the mattresses under the boat are for JUST IN CASE!  😉

Finishing the inside of the boat

IMG_0178?????????IMG_0174IMG_0064

As I did the top decking , I pretty much did the same as I did for the inside. I finished the splash rail, puttied everything with plastic wood, coated it with epoxy, and finally caulked all the joints with the epoxy caulking mixture. Then I sanded everything and coated it with 2 coats of primer. I have everything topside primed except the drivers seat as after the motor is installed, I am going to make a wooden stick steering system the way they used to do it. You have a system of a steering stick, rope, and pulleys to steer with. Above is a picture of one that I took at the museum at Harkers Island that gives you an idea of what it will look like. I will make my pivot point at the seat instead of the floor so all the ropes will be located below the seat. I won’t do this part until the bottom is finished and the boat is flipped back over, motor is mounted, and on the trailer.

.